
EduRe – TAFE QLD Help & Training
How to set personal options
Personalize your Microsoft Dynamics 365 workspace to suit your requirements or preferences. For example, you can choose the page that you want to see as soon as you sign in to Dynamics 365. You can also personalize many other options such as language, currency, and time zone.
- If you’re using Microsoft Dynamics 365 for Outlook, you can set options that affect synchronization between Dynamics 365 and Dynamics 365 for Outlook. More information: Set personal options that affect tracking and synchronization between Dynamics 365 and Outlook or Exchange
- If you’re an administrator, you can set system settings that affect all users in the organization. For more information, search for “System Settings dialog box.”
To set personal options
- Click the Settings button in the upper-right corner of the screen.
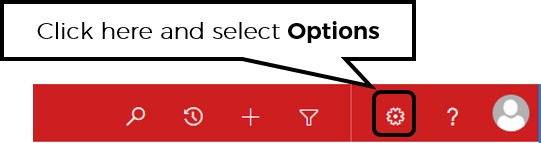
- Click Options.
- Fill in the information, as required. Click on a tab here to see information on settings.
- When you’re done, click OK.
Tip: if you cannot see the “OK” button after setting Personal options, zoom out of your browser window until it becomes visible.
Recommended Settings
General Tab
Formats Tab
Privacy Tab
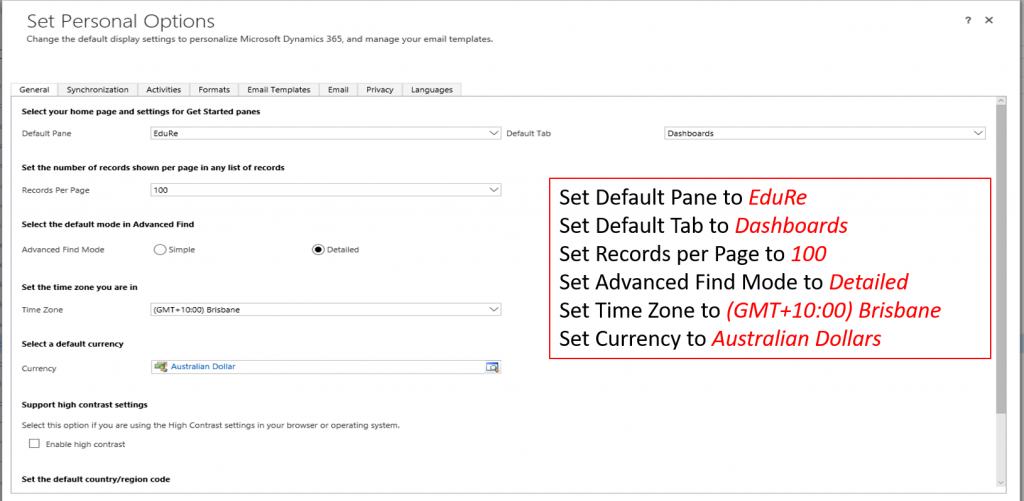
General
| Options | Description |
| Select your home page and settings for Get Started panes | |
| Default Pane | Select the default home pane (page) that you want to see when you sign in to Dynamics 365. For example, you can make Service your default pane if you work mostly in that area. By default, the Default based on user role option is selected, which shows the default pane based on your user role. You can only set panes and tabs that are available for your user role. |
| Default Tab | Select the default tab that you want to see for the selected default pane. For example, select the Accounts tab for the Services pane. |
| Set the number of records shown per page in any list of records | |
| Records Per Page | Select the maximum number of records you want to see in a list on a page. You can set a value from 50 to 250. |
| Select the default mode in Advanced Find | |
| Advanced Find Mode | By default, every time you open the Advanced Find Mode dialog box, the query details are hidden. To see the query details every time, select Detailed. |
| Set the time zone you are in | |
| Time Zone | Select the time zone that you want to display for your region. Note: If you use Dynamics 365 for Outlook, set the same time zone in Dynamics 365 to help prevent a mismatch in dates and times. |
| Select a default currency | |
| Currency | Choose the default currency value to use in financial transactions. Click the Lookup button to search for a currency. |
| Support high contrast settings | |
| Enable high contrast | Select this check box to enable high contrast levels in your Dynamics 365 display. Tip: Set this option if you are using high contrast settings in your browser or operating system. |
| Set the default country/region code | |
| Enable country/region code prefixing | Select this check box to enable the default calling code for your region. |
| Country/Region Code Prefix | Enter the value of your region’s calling code in the text box. For example, enter +61 for Australia. |
| View your user information | Select this link to view details about you. These details are displayed to your entire organization and include your contact information and security role. |
Synchronization
| Options | Description |
| Synchronize Microsoft Dynamics 365 items with Outlook or Exchange | |
| filters | Choose the records to synchronize between Dynamics 365 and Dynamics 365 for Outlook or Exchange (using server-side synchronization). |
| synchronized fields | View the fields that are synchronized between Dynamics 365 and Dynamics 365 for Outlook so you can see where the data is coming from. More information: · View the fields that are synchronized between Dynamics 365 and Dynamics 365 for Outlook · Create or modify synchronization filters or view synchronizing fields Note: Only a system administrator can change the synchronizing fields. |
| Manage your offline filters and take your information offline in Dynamics 365 for Outlook | |
| offline filters | Choose a subset of Dynamics 365 data that you want to work with when you go offline with Dynamics 365 for Outlook. |
Activities
| Options | Description |
| Synchronize Microsoft Dynamics 365 items with Outlook or Exchange | |
| filters | Choose the records to synchronize between Dynamics 365 and Dynamics 365 for Outlook or Exchange (using server-side synchronization). |
| synchronized fields | View the fields that are synchronized between Dynamics 365 and Dynamics 365 for Outlook so you can see where the data is coming from. More information: · View the fields that are synchronized between Dynamics 365 and Dynamics 365 for Outlook · Create or modify synchronization filters or view synchronizing fields Note: Only a system administrator can change the synchronizing fields. |
| Manage your offline filters and take your information offline in Dynamics 365 for Outlook | |
| offline filters | Choose a subset of Dynamics 365 data that you want to work with when you go offline with Dynamics 365 for Outlook. |
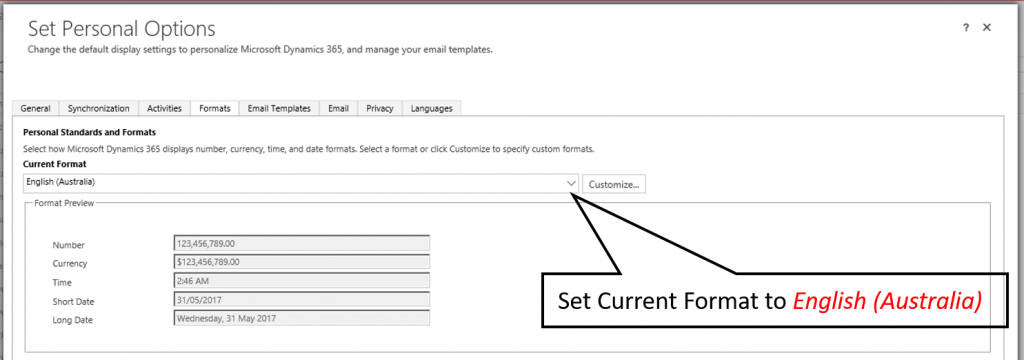
Formats
| Options | Description |
| Create and edit views | |
| Format preview | Shows the current region and its formats for Number, Currency, Time, and Date. |
| Customize | Choose this option to add a new region and formats. |
Email Templates
| Options | Description |
| Create and modify personal email templates | |
| New | Create an email template with custom values (such as a date or signature), so you don’t have to enter the same information, repeatedly, when you send an email. On the command bar, click New and enter values for the template. |
Email Signatures
| Options | Description |
| Create and modify personal email signatures | |
| New | Create an email signature to save time and be consistent in your responses. The owner of an email signature can be a user or a team. On the command bar, click New and enter values for the signature |
| Options | Description |
| Select if other users can send emails for you | |
| Allow other Microsoft Dynamics 365 users to send email on your behalf. Note: This option is not available in Dynamics 365 (on-premises). | Select this option to allow other users of Dynamics 365 to send email on your behalf. Caution: If you select this option, other users can send email on your behalf with or without your consent. Your email name will appear as the sender. |
| Select the email messages to track in Microsoft Dynamics 365 | |
| Track | Select the email messages that you want to automatically track in Dynamics 365. Options: · All Email messages · Email messages in response to Dynamics 365 email · Email messages from Dynamics 365 Leads, Contacts and Accounts · Email messages from Dynamics 365 records that are email enabled |
| Configure Folder Tracking Rules | Set up folders to automatically track incoming email |
| Automatically create records in Microsoft Dynamics 365 | |
| Create | Select this option to allow Dynamics 365 to create leads or contacts automatically from the information in tracked email messages. |
| View your Mailbox | Click this link to see your mailbox details. |
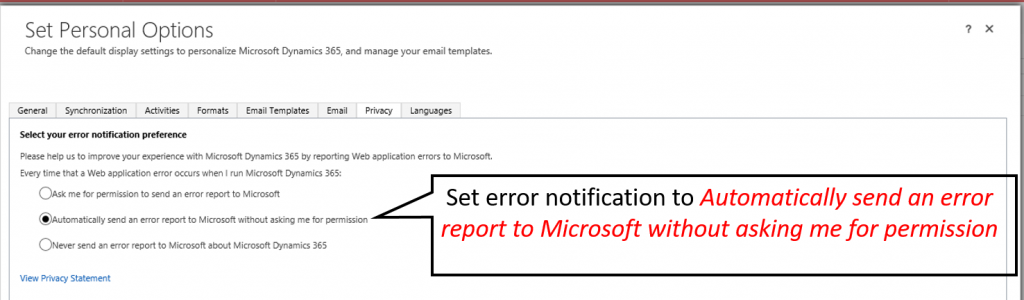
Privacy
Note: This tab is available only in Microsoft Dynamics 365 (online). This tab isn’t available if your system administrator has selected the privacy preference for the entire organization in System Settings. Talk to your administrator. More information: Find your Dynamics 365 administrator or support person
| Options | Description |
| Select your error notification preference | |
Options:
|
Specify what you want Dynamics 365 to do when an error occurs. Based on your selection, the error reports are shared with and used by Microsoft for product improvements. We recommend that you send the error reports to Microsoft so that Microsoft can use the information for product improvements. |
Languages
| Options | Description |
| Select the language you prefer to see Microsoft Dynamics 365 displayed in | |
| Base Language | Shows the base language. The base language is set during the Dynamics 365 installation process. You can’t edit this option. |
| User Interface Language | Select the language that you want to see for labels and dialog boxes in the Dynamics 365 user interface. |
| Help Language | Select the language for Help. To add an additional language other than the base language, your admin must install the required language packs and enable them. Talk to your administrator. |