
EduRe – TAFE QLD Help & Training
In this topic
• Advanced Find
• Categorized search
• Quick search
• View Filtering
• Look Up Record
• Begins with
• Wildcard
• Filter with
• Index bar
• Sort by columns
ο When to Share or Assign an Advanced Find
ο How to Share an Advanced Find
ο How to Assign an Advanced Find
ο When to use Categorized Search
ο How to use Categorized Search
ο How to use the Filter option
ο How to remove a column filter
ο How to remove all column filters
ο How to use the Index Bar option
ο How to save your filtered view as a personal view
Search for records overview
There are a number ways to search for an individual record or group of records, they are, Advance Find, Categorized search, Quick search, and View Filtering.
Search Methods
You can find records in Microsoft Dynamics 365 using the following search methods.
1. Search within a single record type using Advanced Find
Note: You can use this method to search for records, when you want to collate many records, and/or have a need to repeat the search regularly.
– OR –
2. Search across multiple record types using Categorized search
Note: You can use this method to search for records, when you are not sure which record type you want; or you might be trying to find all the record types that contain a specific search string.
– OR –
3. Search within a single record type using Quick search
Note: You can use this method to search for records, when you know the record type you are looking for (e.g. Account), and can use a reasonably unique search string to reduce the records displayed in the search results.
– OR –
4. Search within in a single record type using View filtering
Note: You can use this method to reduce the number of records listed in a system or personal view. You may be trying to find a single record or a smaller group of records.
– OR –
5. Search within a single record type using Look Up Record filtering
Note: You can use this method to reduce the number of records listed within a Look up. You may be trying to associate one record with another; e.g. add an Account to a Business Opportunity.
Search String approaches
The search string you enter will greatly affect the list of records returned as the “Search Results”. There are two different ways to enter your search string. You can use two different approaches, these are “Begins with” or “Wildcard”.
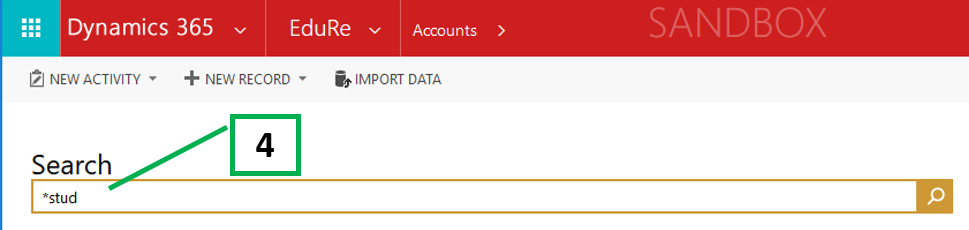
Begins with
The “Begins with” approach allows you to search for records that comprise fields that begin with alphabetic or numeric characters.
E.g. “queens” instead of “Queensland”, “stud” instead of “studio”, “045” instead of “0459 888 000”, “a2” instead of “A2 Milk”, etc.
Note: your search string can be all lower-case characters, the search results returned will include upper and lower-case matches.
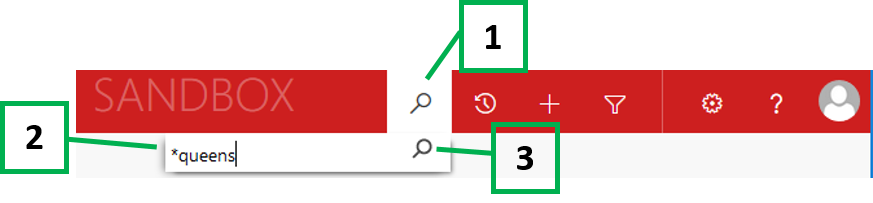
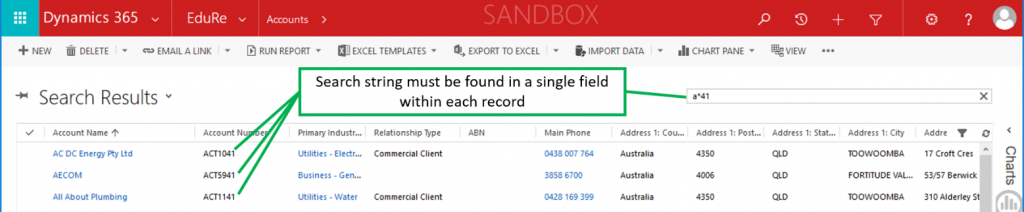
Wildcard
The “Wildcard” approach allows you to search for records that comprise fields containing the character string entered before and/or after the wildcard (asterisk).
E.g. “*queens”, “*stud”, “*59 88”, “*milk”, etc.
Note: a wildcard asterisk may be used at the beginning of a search string, or in the middle of a search string (which combines both the “begins with” and “wildcard” approaches).
It is not necessary to add a wildcard at the end of your search string.
E.g. “k*stud” meaning the record must comprise of a field that begins with “k”, has some characters after the “k”, and then contains “stud”.
Search Results filtering
Regardless of the search method used, you can apply filtering to refine your search criteria and reduce the search results.
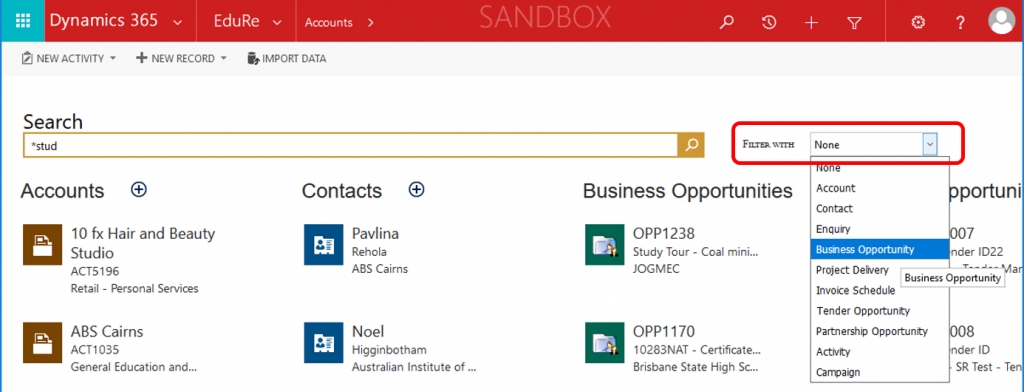
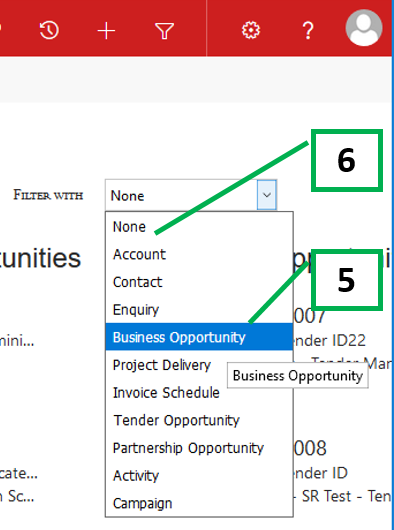
Filter with
You can only filter Categorized search results using the “FILTER WITH” option, which limits the search to a single record type, selectable from the dropdown list.
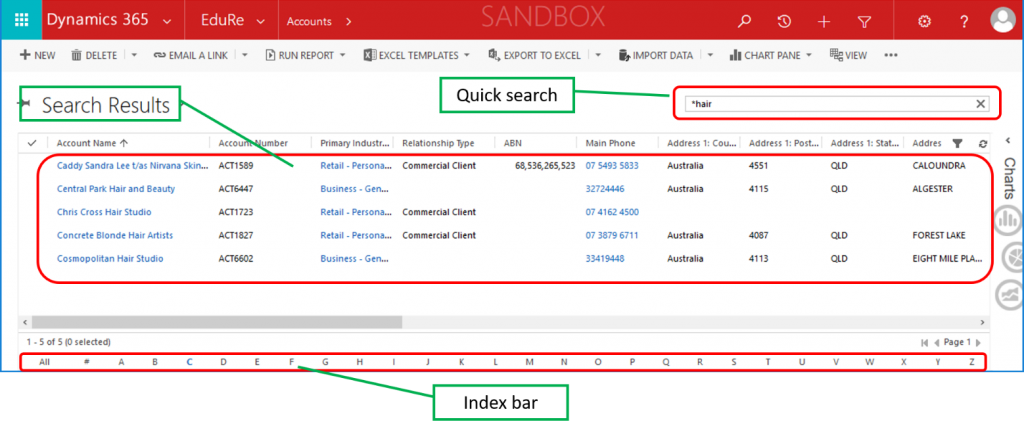
Index bar
You can only filter Quick search results using the Index bar filter in the Quick search view.
Search Results sorting
All views (or grids) can be sorted by clicking on a single column heading, or using the Shift key and a mouse click in combination, to sort by multiple columns.
Sort by columns
1. If you are looking at the Active Accounts view; and click the column heading for “Address 1; City”, the search results will be sorted by that column.
2. However, if you press and hold the Shift key, and then click on another column, say “Address 1: Postcode”, the search results will be sorted by “Address 1: Postcode” within “Address 1: City”.

Using Advanced Find
All record types may be searched using this method; but only a single record type at any one time.
When to use Advanced Find
You can use Advanced Find to search for records, when you want to get many records, and/or have a need to repeat the search regularly.
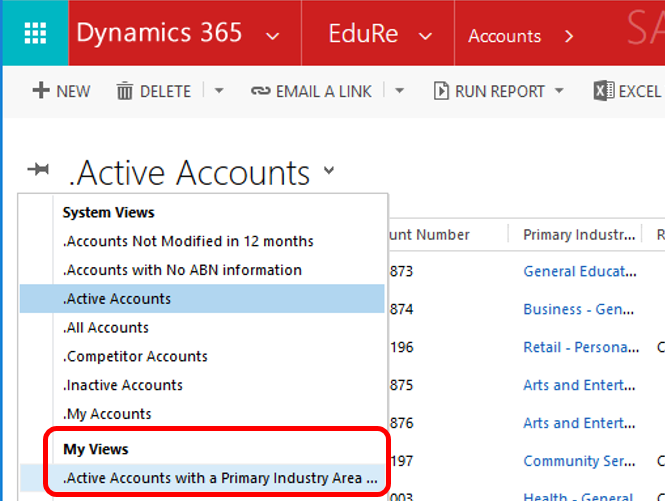
Advanced Find searches can be saved, thereby becoming part of My Views.
How to use Advanced Find
You can create an Advanced Find search by following the steps below.
Note: more information can be found in the Advanced Finds and Views section
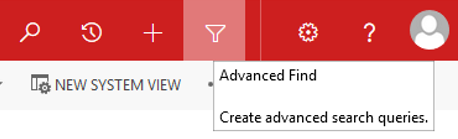
1. Click on the Advanced Find icon in the navigation bar

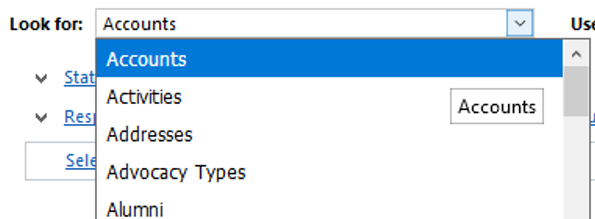
2. In the Look for: options, select the required record type
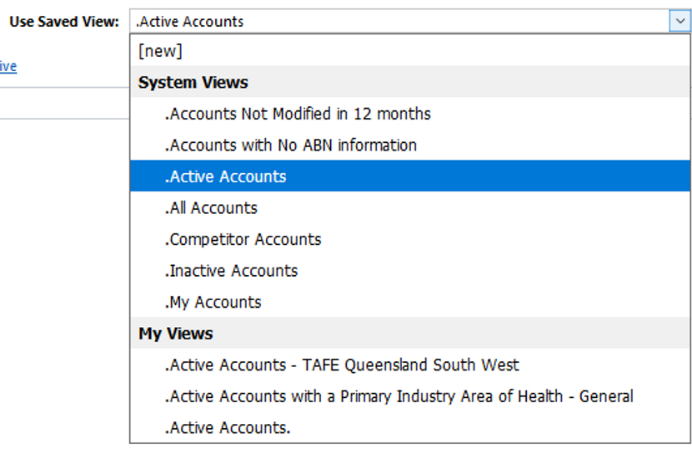
3. In the Use Saved View: option, select [new], a system view or personal view
4. Click on Edit Columns in the ribbon
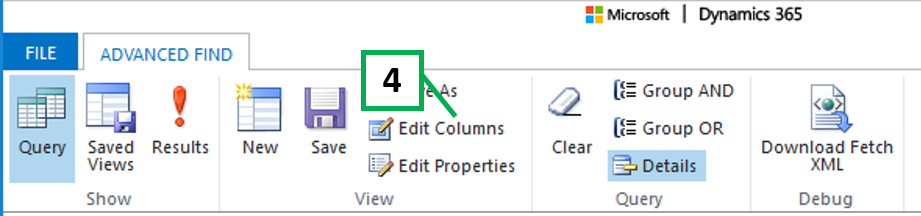
a. Move columns (left or right)
b. Configure sorting
c. Add Columns
d. Change Properties
e. Remove

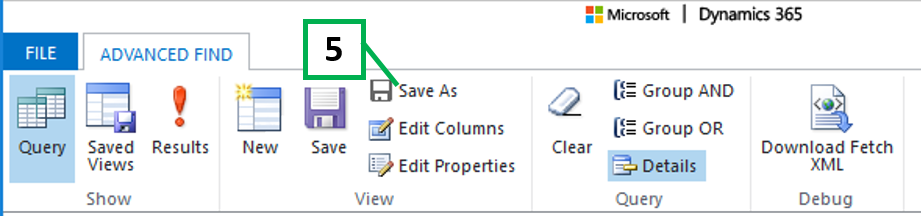
5. Click on Save As in the ribbon
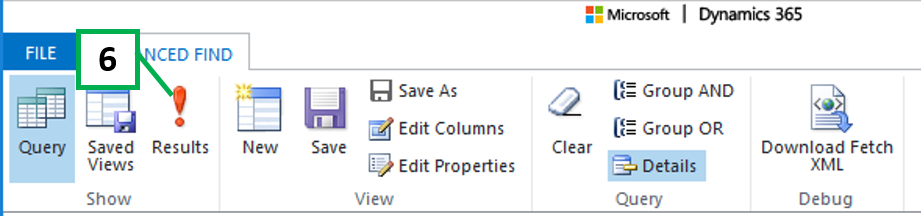
6. Click on Results in the ribbon, to see the search results
How to Share an Advanced Find
1. Click on the Advanced Find icon in the navigation bar
2. Click on Saved Views

3. Click on Record Type
4.Use the Scroll bar to locate the record type
5. Click on the Record Type you wish to select

6. Select the Saved View you wish to share
7. Click on Share

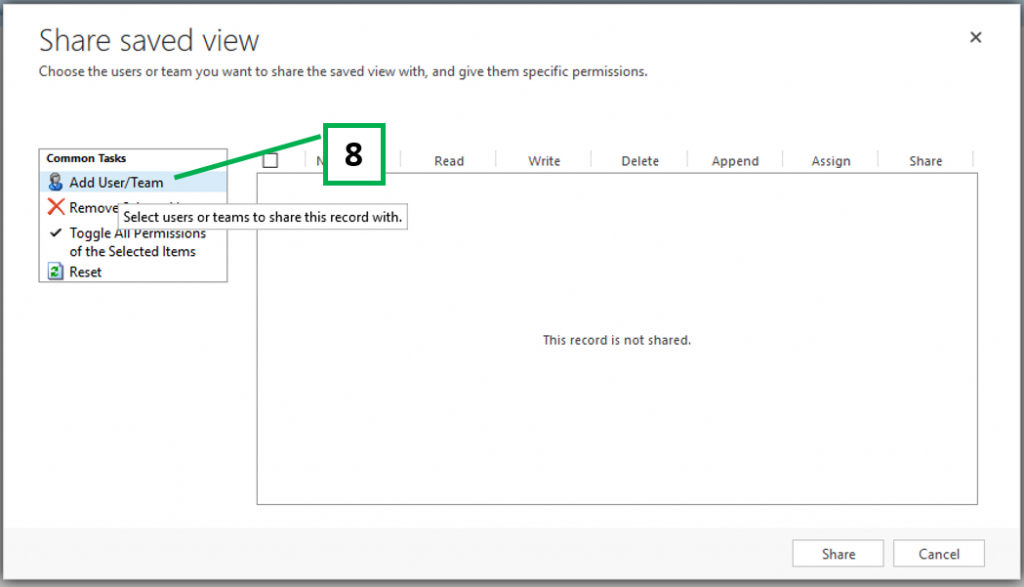
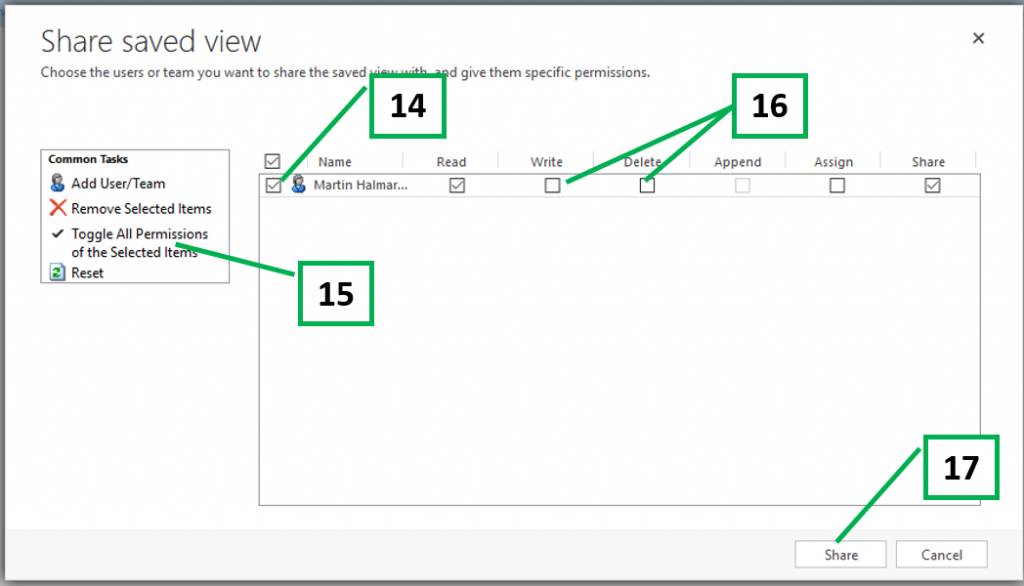
8. Click on Add User/Team in the Share saved view pop up
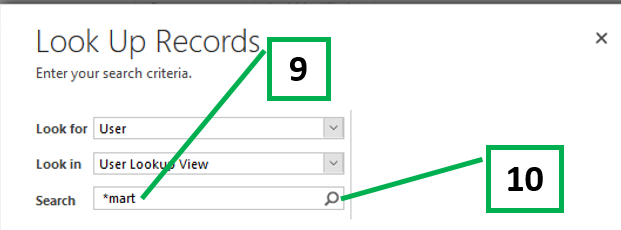
9. Enter your search string
10. Click on the search icon
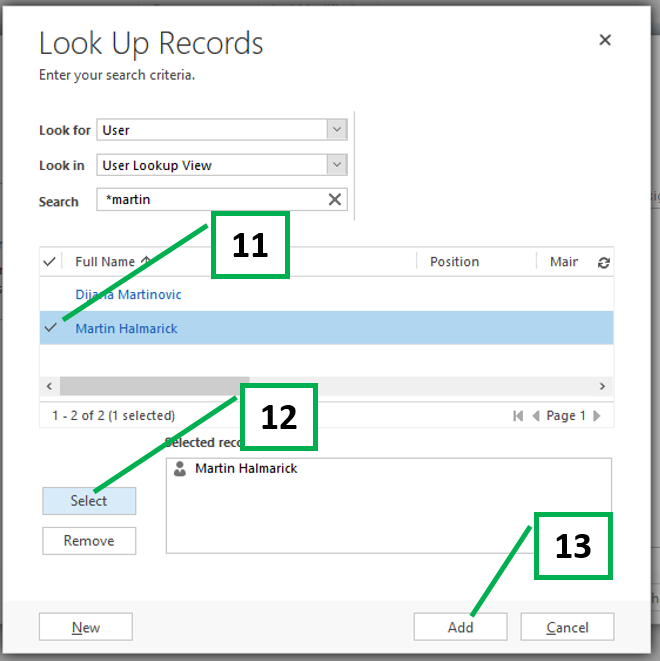
11. Select the user or team from the search results listed
12. Click on Select
Note: You can add multiple users by repeating steps 9 through 12.
13. Click on Add
14. Select the user or team
15. Click on Toggle All Permissions of the Select Items
16. Click on Write and Delete, to remove the update and delete permissions
17. Click on Share
How to Assign an Advanced Find
1. Click on the Advanced Find icon in the navigation bar
2. Click on Saved Views
3. Click on Record Type
4. Use the Scroll bar to locate the record type
5. Click on the Record Type you wish to select
6. Select the Saved View you wish to assign
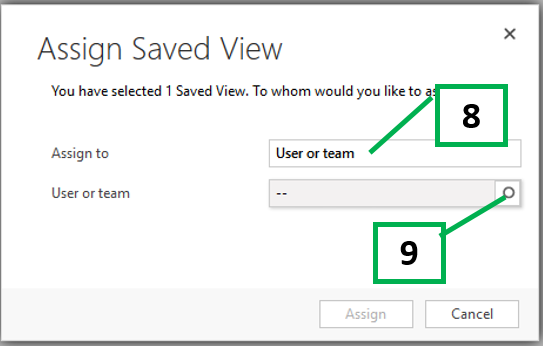
7. Click on Assign Saved Views
8. Click in the Assign to field, thereby selecting the “User or team” option
Note: this field toggles between “Me” and “User or team”
9. Click on the search icon
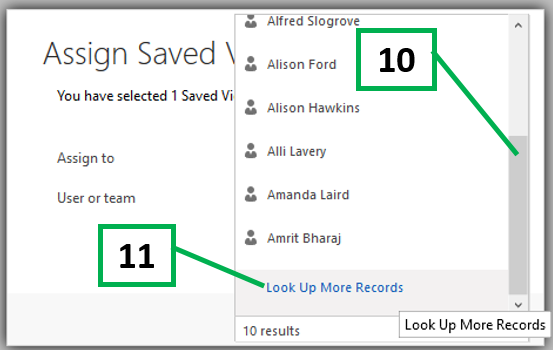
10. Use the Scroll bar to locate the Look Up More Records
11. Click on Look Up More Records
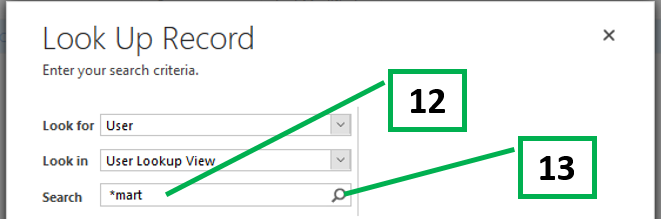
12. Enter your search string
13. Click on the search icon
14. Select the user from the search results listed
15. Click on Add

16. Click on Assign
Note: this action will assign the view to the selected user or team and remove the view from your Saved Views.

Using Categorized Search
Only the Account; Contact; Enquiry; Business Opportunity; Project Delivery; Tender Opportunity; Partnership Opportunity; Activity; Competitor; Campaign record types may be searched using this method.
By default, all the record types mentioned above will be searched, unless you explicitly filter by a specific record type.
Note: not all fields within any specific record type are searched; only those fields that have been agreed upon and designated as searchable.
When to use Categorized Search
You can use Categorized Search to find records, when you are not sure which record type you want; or you might be trying to find all the record types that contain a specific search string.

How to use Categorized Search
1. Click on the Search ![]() icon within the top navigation bar.
icon within the top navigation bar.
2. Enter your search string into the search field provided,
3. Press the Enter key to start the search.
Note: this action will open a new search page.
4. You may change your search criteria by entering a new search string into the search box.
5. To filter results by one record type, on the search screen, choose a record type from the Filter with: drop-down box.
6. To search against all record types, choose None in the Filter with: drop-down box.
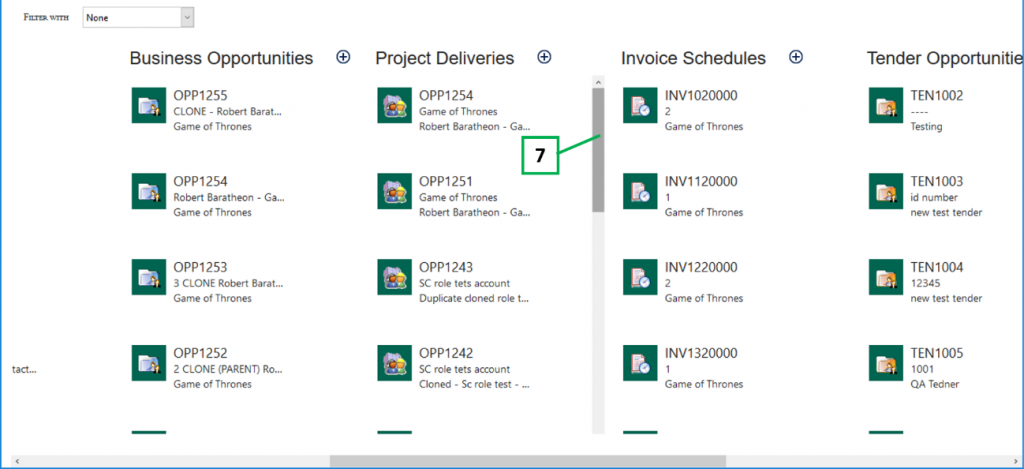
7. You can scroll up and down each record type list in search results by using scroll bar.
Note: the scroll bar only becomes visible when your curser is within each list of records.
Using Quick Search
All record types may be searched using this method; but only a single record type at any one time.
Note: not all fields within any specific record type are searched; only those fields that have been agreed upon and designated as searchable.
When to use Quick Search
You can use Quick Search to find records, when you know the record type you are looking for (e.g. Account), and can use a reasonably unique search string to reduce the records displayed in the search results.
Note; the unique search string can contain full or partial words, numbers and wildcards, or combination of these characters.
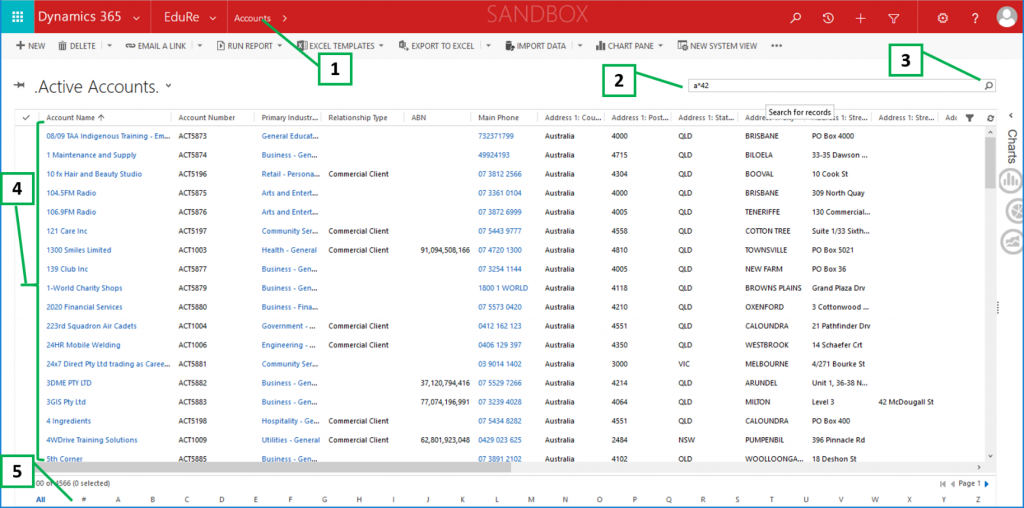
How to use Quick Search
1. Navigate to the selected record type,
e.g. Contact, Business Opportunity, Project Delivery, Tender Opportunity, etc.
2. Type your search string in the “Search for records” search box.
a. Begins with – results include records that begin with a specific word. For example, if you want to search for “Alpine Ski House”, type alp in the search box; if you type ski, the record won’t show up.
b. Wildcard – for example: *ski or *ski*.
3. Press the Enter key on your keyboard, or click the Search icon to start the search.
4. The Search Results will be displayed.
5. Use the Index Bar to apply a filter to the Search Results.
Using View filtering
All record types may be searched using this method; but only a single record type at any one time.
There are two ways to filter a view, by using the Filter or Index Bar option.
When to use View Filtering
You can use View Filtering to reduce the number of records listed in a system or personal view. You may be trying to find a single record or a smaller group of records.
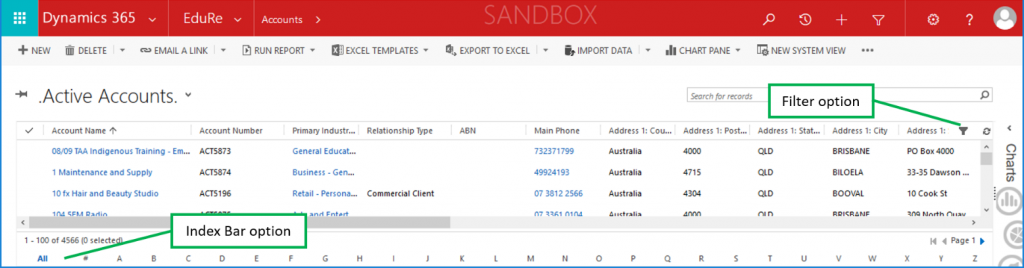
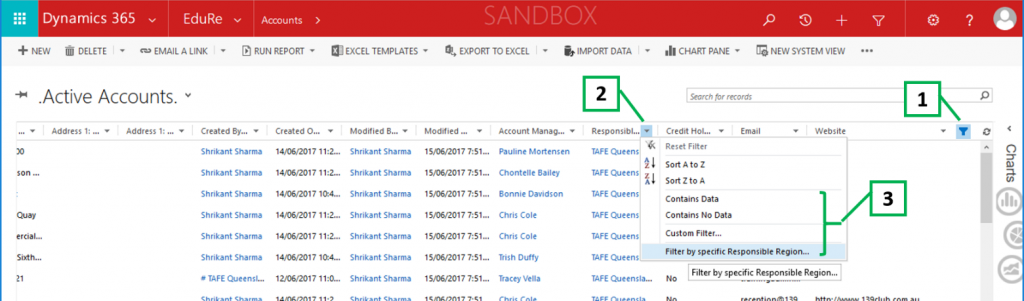
How to use the Filter option
1. To filter a system or personal view, click on the Filter ![]() icon.
icon.
Note: this action will add an arrow next to each column heading, like Excel column filtering
2. Click on the arrow next to the column heading to create a filter based on that column.
3. Select the Filtering type you wish to use on the select column.
Note: the filter operators available will depend on the type of data (lookup, text, date, numeric, etc.) of the column.
a. Click on the Contains Data operator
if you only want records where the selected column contains some data (not blank).
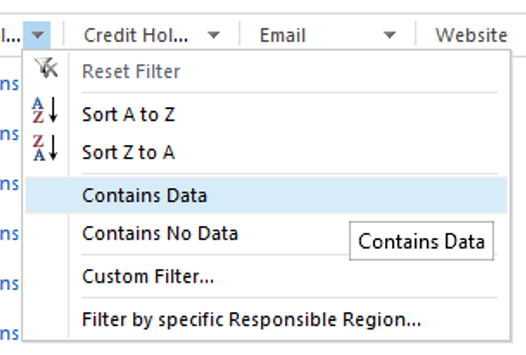
b. Click on the Contains No Data operator
If you only want records where the selected column is blank.

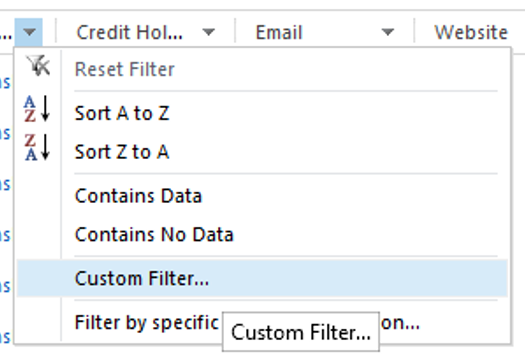
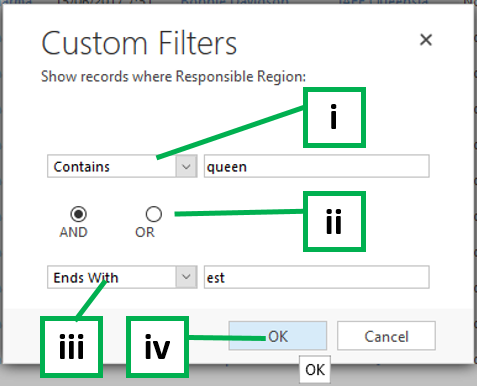
c. Click on the Custom Filter action
If you want to apply a custom operator to the selected column.
I. Select the operator that best fits your requirement
II. Select the Group operator (if required)
III. Select a second operator (if required)
IV. Click on OK
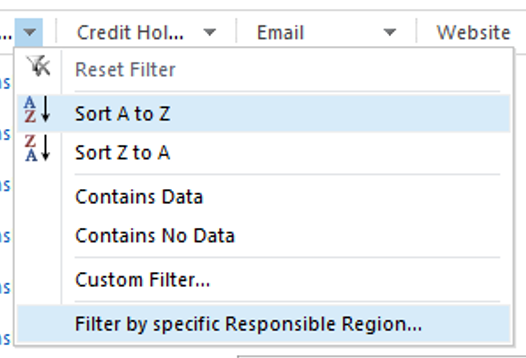
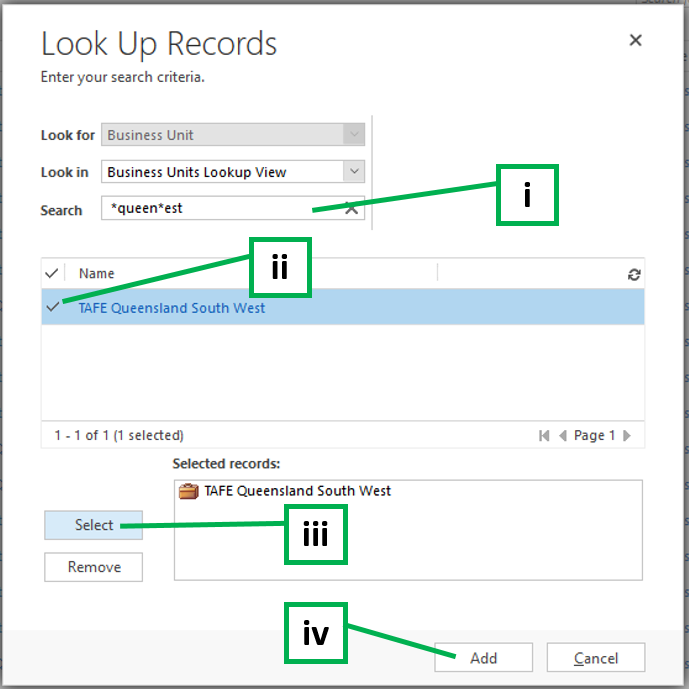
d. Click on the Filter by specific… action
If you want to select 1 or more lookup values to filter the selected column.
I. Enter your Search string and press enter or click on the search icon
II. Highlight the required record from the search results
III. Click on the Select button to add the record to the Select records: box
IV. Click on Add
4. Repeat steps 2 and 3 to filter on additional column filtering
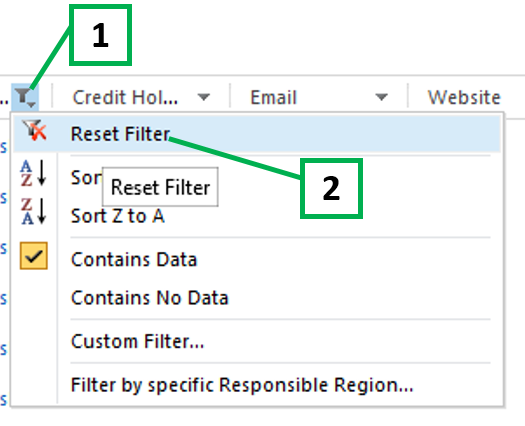
How to remove a column filter
1. Click on the arrow next to the column heading,
2. Click on Reset Filter
How to remove all column filters
1. Click on the Filter ![]() icon.
icon.
Note: this action will turn off filtering

How to use the Index Bar option
1. Click on a character in the Index Bar
Note: this action will automatically filter the view by the “primary” column. This is usually the first column listed within the view.

a. Click on All to include all the records in the view
b. Click on # to only include records that start with a number
c. Click on A to Z to only include records that start with that alphabetic character
Note: The Index Bar can be used in conjunction with the Filter option
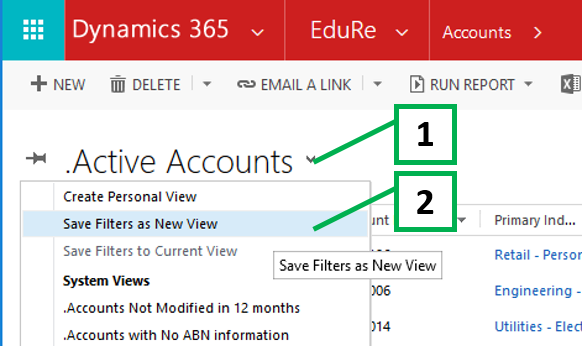
How to save your filtered view as a personal view
You can save your filtered view as a personal view, so that you can reuse the view regularly. These personal views
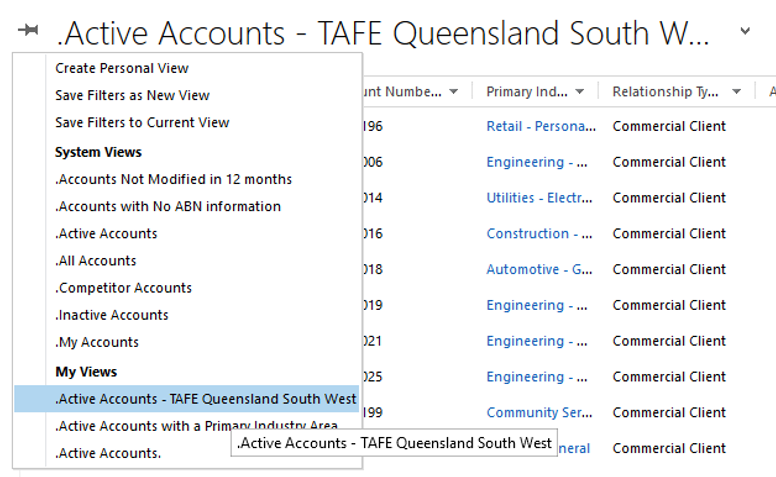
1. Click on the View list
2. Click on Save filters as New View
3. Enter a new name for your personal view
4. Click Save
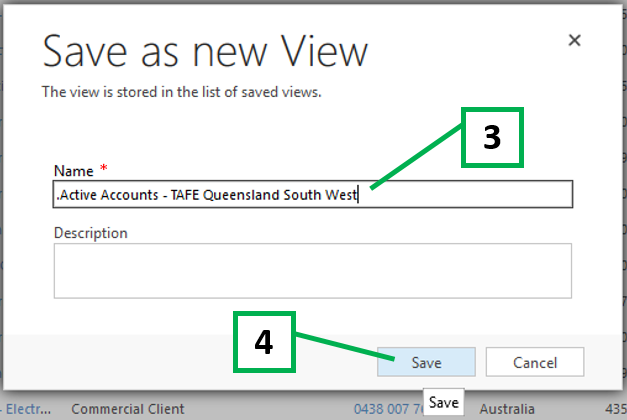
Note: clicking on Save will make the view available in My Views
Using Look Up Record filtering
All record types may be searched using this method; but only a single record type at any one time.
The Look Up Record method allows you to combine two search methods (Advanced Find and Quick Search), to reduce the number of records returned in the search results.
Note: not all fields within any specific record type are searched; only those fields that have been agreed upon and designated as searchable when using Look Up Record.
When to use Look Up Record filtering
You can only use Look Up Record filtering to find a record, when you are adding a relationship between two records; e.g. adding an Account to Business Opportunity, Project Delivery, or Tender Opportunity, etc.
How to use the Look Up Record option
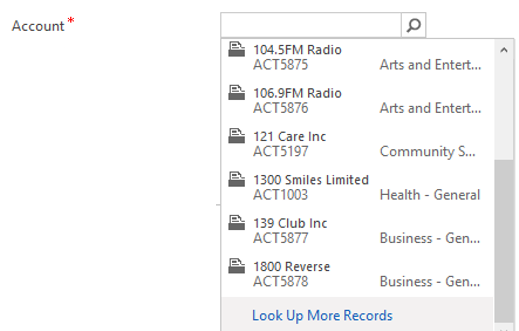
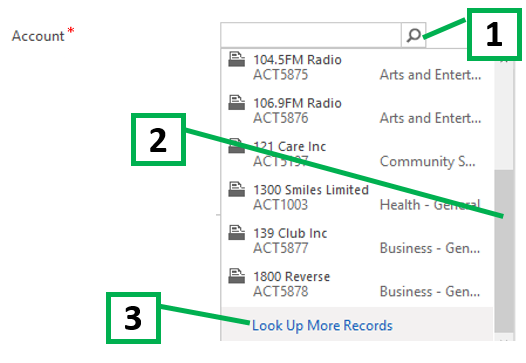
1. Click on the magnifying glass icon.
2. Scroll down to the bottom of the list shown (if necessary),
3. Click on Look Up More Records.
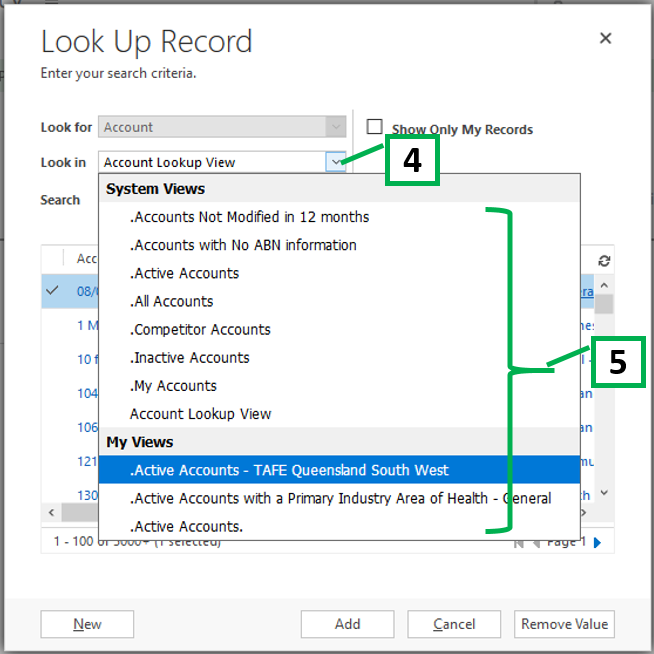
4. Click on the drop-down arrow to see available views
5. Select the view that best suits your needs
6. Enter your search string (if required)
7. Scroll, Page, and Select the required record
8. Click on Add
