EduRe – TAFE QLD Help & Training
What is a Contact?
If your job involves engaging with current or potential individuals, then you will need to use the Contact record type to capture and manage their information.
Business standards for Contacts
EduRe can have any number of levels in account hierarchy. However, the TAFE Queensland business rule is to have only three levels of hierarchy.
Any request to have more than 3 levels within a business hierarchy needs the approval of the Business Development Director/Manager.
When creating an account in CRM use the following rules
1. No Abbreviations. E.g. Dept.
2. Use the name provided on business card and/or email signature
3. Do not include the suffix of Pty, Ltd, etc.….
Ownership means the nominated person is responsible for maintaining the information within EduRe and the relationship
4. Accounts – In a TAFE Wide CRM Account Ownership has no relevance –
1. Business Rule; TAFE Queensland ‘owns’ ALL accounts
5. Contacts
1. Business is built on person to person relationships therefore someone needs to own a Contact.
i. Business Rule – The Contact Owner is responsible for all communication with the Contact.
2. All communication to the Contact should go through the TAFE Owner unless agreed by the TAFE Owner
3. Relationship Development occurs and is captured at the contact level
4. Business Rule; If there is a lead or an opportunity that has come up, it should be brought to the attention Contact Owner
Create a Contact from an Account
A contact record can be quickly created by using the quick create feature available from within an account record by following the steps below.
1. Select EduRe in the navigation bar
2. Click on Account in the menu options
3. Find and select the required record from the displayed list of records
– OR –
Enter a search string to find the required record
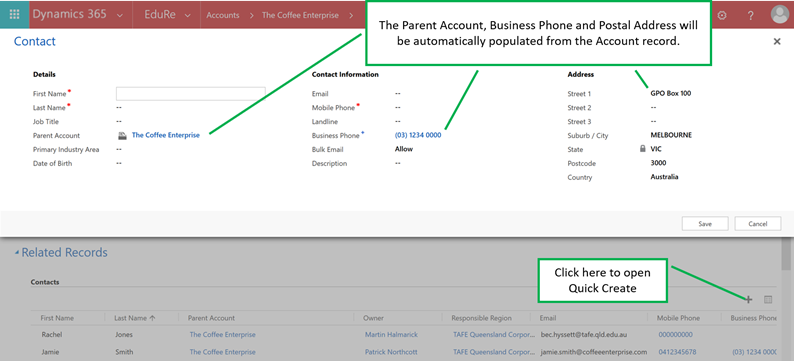
4. Scroll down to Contacts in the Related Records section
5. Click on the plus sign within the Contacts sub-grid, this action will display the Quick Create form over the top of the Account form
6. Enter the mandatory and optional information as needed
7. Click Save within the Quick Create form
Create a Contact
1. Select EduRe in the navigation bar
2. Click on Contact in the menu options
3. Choose +NEW from the command bar
4. Enter the relevant information in the following sections:
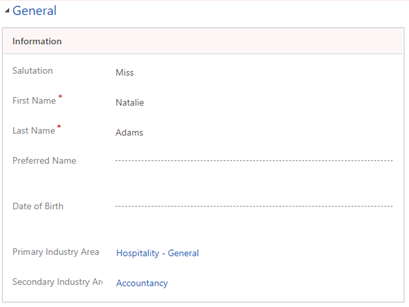
(General) Information
The Information section is used to capture the individuals ‘social or honorific title’, e.g. Ms, Mr, etc., their given and aka (also known as) names, date of birth, primary and secondary industry focus. Only the First and Last Name are mandatory fields.
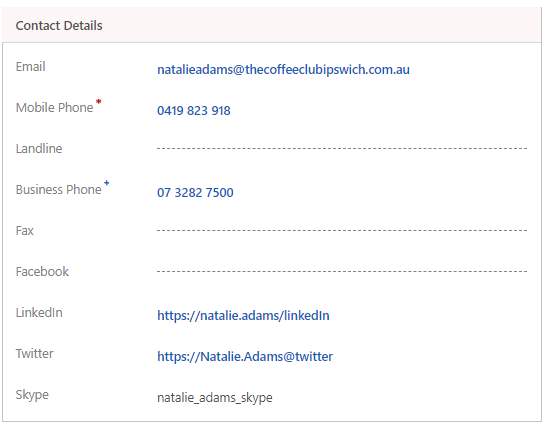
(General) Contact Details
The Contact Details section is used to capture the individuals contact information and social media references. Only the mobile phone number is mandatory
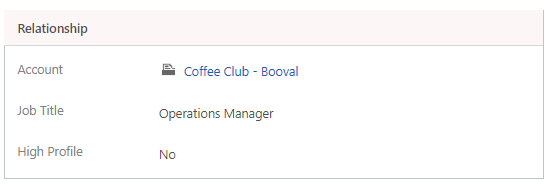
(General) Relationship
The Relationship section is used to identify the associated company or organization, the individuals job title, whether TAFE considers the individual as a high importance.
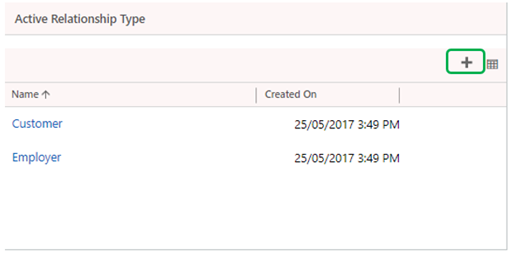
(General) Activity Relationship Type
The Active Relationship Type section is used to capture the various working relationships between TAFE Queensland and the individual.
Additional, optional Relationship Types may only be added after saving the Contact record, by clicking on the plus sign, outlined in green in the below image.
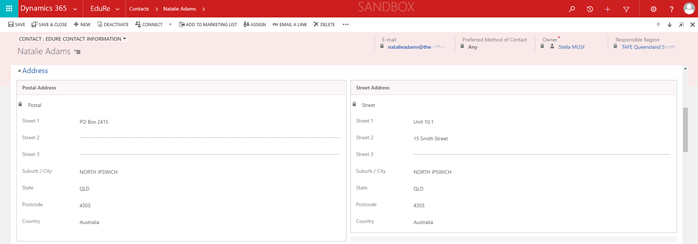
(Address) Postal and Street Address
The Address section is used to capture the individuals postal and street addresses. The postal address is the most critical of these 2 addresses, as this address is used on Business Proposals.
The State field will only become ‘unlocked’ once the Country field has been selected. State drop down lists are provided when the country selected, is Australia or the United States. The State field will be a free text field for any other selected country.
(Administration) Marketing Information and Contact Preferences
The Administration section is used to capture the individuals marketing and contact preferences.
The Send Marketing Material field is a general opt-in/opt-out indicator for the use in electronic direct marketing. The Last Date Included in Campaign field is system controlled, and indicates when this individual was included in a campaign.
The set contact preferences are a lower level of directives made by the individual, regarding how they would like to contacted.

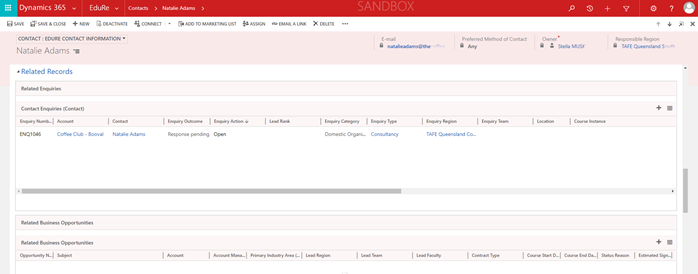
(Related Records) Enquiries, Business Opportunities, Project Deliveries and Partnerships
The Related Records section exposes any Enquiries, Business Opportunities, Project Deliveries, or Partnerships that have an association with the individual.
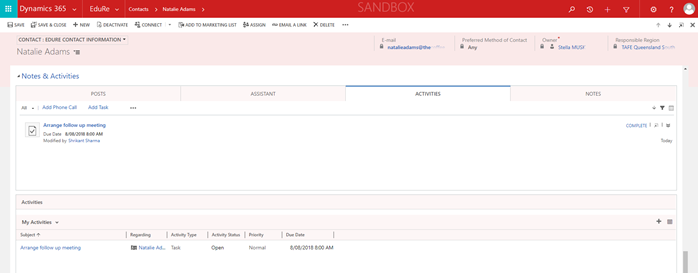
(Notes & Activities) Notes and/or Activities
The Notes and Activities section delivers all associated Posts, Activities and Notes in an easy to read listing.
i. Clicking on Posts will display the posted comments (Auto Posts or User entered Posts) regarding this contact.
New User posts may also be added within this area.
ii. Clicking on Activities will display all activities (email, phone call, appointment or task) regarding this contact.
New activities may also be added within this area. Adding an Appointment or Task requires you to click on the more commands … icon. Filtering and sorting is also available within Activities.
iii. Clicking on Notes will display all the notes (automatically or manually created) regarding this contact.
New Notes may also be added within this area.
5. Click on SAVE & CLOSE (to save the entered information and close the Contact)
– OR –
Click on SAVE (to save the Contact and continue working on the record)
Edit a Contact
6. Select EduRe in the navigation bar
7. Click Contacts in the menu options
8. Find and select the required record from the displayed list of records
– OR –
Enter a search string to find the required record
9. Choose +EDIT from the command bar
– OR –
Double click (in white space) from the displayed records
10. Click on SAVE & CLOSE (to save the entered information and close the Contact)
– OR –
Click on SAVE (to save the Contact and continue working on the record)
Deactivate or activate a Contact
Contacts within EduRe can be deactivated or activated in one of two ways; either from the filters in the initial Contacts overview, or from within a Contact record itself.
From the initial Contacts overview, you can deactivate or activate multiple Contacts at once.
To deactivate or activate a Contact(s) from the Contacts overview;
11. Select EduRe in the navigation bar
12. Click Contacts in the menu options
13. Find and select the required record(s) from either the Active Contacts or Inactive Contacts filter
14. Choose either ACTIVATE or DEACTIVATE as required from the command bar
15. Click on ACTIVATE from within the Confirm Account Activation pop-up window or DEACTIVATE from within the Confirm Deactivation pop-up window
To deactivate or activate a Contact from the Contact record;
16. Select EduRe in the navigation bar
17. Click Contacts in the menu options
18. Find and select the required record
19. Double click (in white space) from the displayed records to open the record
20. Choose either ACTIVATE or DEACTIVATE as required from the command bar
21. Click on ACTIVATE from within the Confirm Account Activation pop-up window or DEACTIVATE from within the Confirm Deactivation pop-up window
Assign a Contact to a User or Team
Contacts within EduRe can be assigned to another User or Team, from the Contact view or within an opened Contact record.
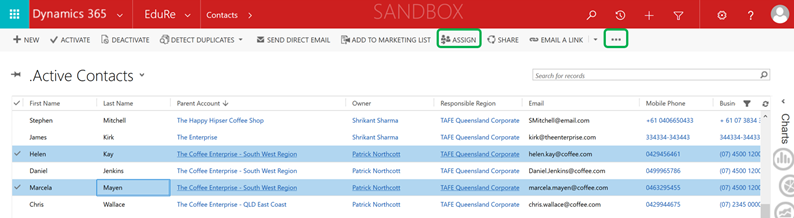
From a Contact view, you can assign one or multiple Contact records.
To assign a Contact(s) from an Contact view, or from within a Contact record.
1. Select EduRe in the navigation bar
2. Click Contact in the menu options
3. Find and select the required record(s) from any of the Contact views
4. Click on the Assign button in the command bar (or from the more commands …)
– OR –

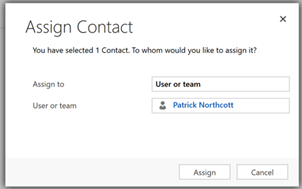
5. Select “User or Team” by clicking in the Assign to field.
6. Select a value from the User or Team field, or click the magnifying glass icon to look up more records
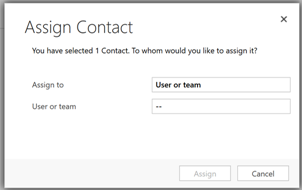
7. Select Team or User in the Look for field to enable the correct lookup selection list
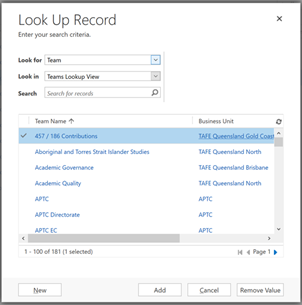
8. Click on Assign, to initiate the assign process